
134 lines
9.2 KiB
Markdown
134 lines
9.2 KiB
Markdown
My own version "from scratch" of a self-rescaling CFG / anti-burn. It ain't much but it's honest work.
|
|
|
|
## Last update (14.05.24):
|
|
- added node: **preset loader**. Can do what the other can and MUCH MORE! (note: mostly tested with SDXL, the "Red riding latent" preset does not work with SD1.5)). The presets are .json files and can contain a string which will go through eval(). Always check what is inside before running it.
|
|
- added node: "**Excellent attention**" developped by myself and based on this [astonishingly easy to understand research paper!](https://github.com/Extraltodeus/temp/blob/main/ihave.jpg) But in short:
|
|
- This node allows to disable the input layer 8 on self and cross attention.
|
|
- But also to apply a custom modification on cross attention middle layer 0.
|
|
- While the modification is definitely not very ressource costy, the light patch uses less VRAM.
|
|
- The multiplier influences the cross attention and reinforces prompt-following. But like for real.
|
|
- I have only tested it with SDXL.
|
|
- You can find a grid example of this node's settings in the "grids_example" folder.
|
|
- For some reason the Juggernaut model does not work with it and I have no idea why.
|
|
- Attention modifier presets! Try them with the preset loader!
|
|
- I discovered that disabling the input layer 8 on the cross or self attention tends to make more random images. This layer seems to be the main responsible for the overall composition while not being alone at the task. Disabling it for the self attention for generating the positive denoised is risky regarding the image coherence but tends to create more interesting images more driven by your prompt. For the cross attention it creates more coherent images with a bit less prompt following. The results are most interesting. Doing it in the negative seems to be an improvement. The only rule is to keep at least one of the attentions for the positive. You will find the possibility to do experiment about that through the presets loader and the "excellent attention" node.
|
|
|
|
### [If you want to use my latest model you can download it HERE!](https://www.patreon.com/posts/iris-lux-1051-104239837)
|
|
### [Gallery](https://www.patreon.com/posts/example-gallery-104245818) of generated images with this latest update.
|
|
|
|

|
|
|
|

|
|
|
|
<sub>12 steps in one shot / 4.2 seconds per image with an RTX4070</sub>
|
|
|
|
|
|
# In short:
|
|
|
|
No more burns and 160% faster gens with the warp drive node.
|
|
|
|
Customized sampling modifiers.
|
|
|
|
# Usage:
|
|
|
|
|
|
|
|
|
|
### That's it!
|
|
|
|
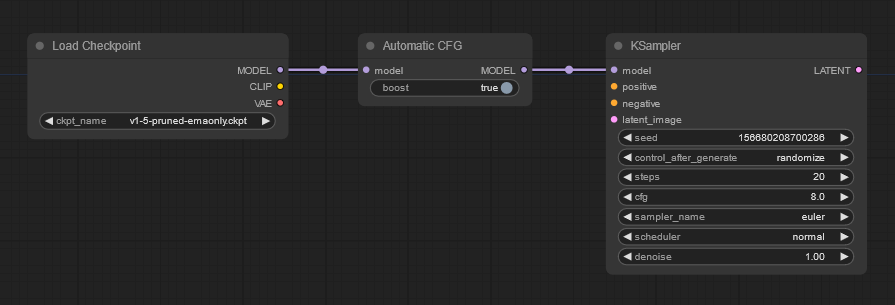
- The "boost" toggle will turn off the negative guidance when the sigmas are near 1. This doubles the inference speed.
|
|
- The negative strength lerp the cond and uncond. Now in normal times the way I do this would burn things to the ground. But since it is initialy an anti-burn it just works. This idea is inspired by the [negative prompt weight](https://github.com/muerrilla/stable-diffusion-NPW) repository.
|
|
- I leave the advanced node for those who are interested. It will not be beneficial to those who do not feel like experimenting.
|
|
|
|
For 100 steps this is where the sigma are reaching 1:
|
|
|
|

|
|
|
|
Note: the warp drive node improves the speed a lot more. The average speed is 160% the normal one if used with the AYS scheduler (check the workflow images).
|
|
|
|
There seem to be a slight improvement in quality when using the boost with my other node [CLIP Vector Sculptor text encode](https://github.com/Extraltodeus/Vector_Sculptor_ComfyUI) using the "mean" normalization option.
|
|
|
|
# Just a note:
|
|
|
|
Your CFG won't be your CFG anymore. It is turned into a way to guide the CFG/final intensity/brightness/saturation. So don't hesitate to change your habits while trying!
|
|
|
|
# The rest of the explaination:
|
|
|
|
While this node is connected, this will turn your sampler's CFG scale into something else.
|
|
This methods works by rescaling the CFG at each step by evaluating the potential average min/max values. Aiming at a desired output intensity (by intensity I mean overall brightness/saturation/sharpness).
|
|
The base intensity has been arbitrarily chosen by me and your sampler's CFG scale will make this target vary.
|
|
I have set the "central" CFG at 8. Meaning that at 4 you will aim at half of the desired range while at 16 it will be doubled. This makes it feel slightly like the usual when you're around the normal values.
|
|
|
|
The CFG behavior during the sampling being automatically set for each channel makes it behave differently and therefores gives different outputs than the usual.
|
|
From my observations by printing the results while testing, it seems to be going from around 16 at the beginning, to something like 4 near the middle and ends up near ~7.
|
|
These values might have changed since I've done a thousand tests with different ways but that's to give you an idea, it's just me eyeballing the CLI's output.
|
|
|
|
I use the upper and lower 25% topk mean value as a reference to have some margin of manoeuver.
|
|
|
|
It makes the sampling generate overall better quality images. I get much less if not any artifacts anymore and my more creative prompts also tends to give more random, in a good way, different results.
|
|
|
|
I attribute this more random yet positive behavior to the fact that it seems to be starting high and then since it becomes lower, it self-corrects and improvise, taking advantage of the sampling process a lot more.
|
|
|
|
It is dead simple to use and made sampling more fun from my perspective :)
|
|
|
|
You will find it in the model_patches category.
|
|
|
|
TLDR: set your CFG at 8 to try it. No burned images and artifacts anymore. CFG is also a bit more sensitive because it's a proportion around 8.
|
|
|
|
Low scale like 4 also gives really nice results since your CFG is not the CFG anymore.
|
|
|
|
# Updates:
|
|
|
|
Updated:
|
|
- Up to 28.5% faster generation speed than normal
|
|
- Negative weighting
|
|
|
|
05.04.24:
|
|
|
|
- Updated to latest ComfyUI version. If you get an error: update your ComfyUI
|
|
|
|
15.04.24
|
|
|
|
- ~~Added "no uncond" node which completely disable the negative and doubles the speed while rescaling the latent space in the post-cfg function up until the sigmas are at 1 (or really, 6.86%). By itself it is not perfect and I'm searching for solutions to improve the final result. It seems to work better with dpmpp3m_sde/exponential if you're not using anything else. If you are using the PAG node then you don't need to care about the sampler but will generate at a normal speed. Result will be simply different (I personally like them).~~ use the warp drive instead
|
|
- To use the [PAG node](https://github.com/pamparamm/sd-perturbed-attention/tree/master) ~~without the complete slow-down (if using the no-uncond node) or at least take advantage of the boost feature:~~
|
|
~~- in the "pag_nodes.py" file look for "disable_cfg1_optimization=True"~~
|
|
~~- set it to "disable_cfg1_optimization=False".~~ This is not necessary anymore because the dev modified it already :)
|
|
- For the negative lerp function in the other nodes the scale has been divided by two. So if you were using it at 10, set it to 5.
|
|
|
|
16.04.24
|
|
|
|
- Added "uncond_start_percentage" as an experimental feature. This allows to start the guidance later as a way to try [Applying Guidance in a Limited Interval Improves
|
|
Sample and Distribution Quality in Diffusion Models](https://arxiv.org/pdf/2404.07724.pdf). A more accurate implementation [can be found here](https://github.com/ericbeyer/guidance_interval) :)
|
|
|
|
17.04.24
|
|
|
|
- reworked the advanced node and cleaned up
|
|
- added timing on every options
|
|
- add a post-rescale node which allows to fight deep-frying images a bit more forr some special cases
|
|
- added a tweaked version of the Comfy SAG node with start/end sliders
|
|
- changed start/end sliders, they are related directly to the sigma values and not in percentage anymore. ⚠
|
|
|
|
01.05.24
|
|
|
|
- Actually working disabled uncond
|
|
- Added "warp drive" preset to test it out simply.
|
|
|
|
03.05.24
|
|
|
|
- Allows unpatch `turn off the negative` by removing or disconnecting the node.
|
|
- added the "Warp drive" node. It uses a new method of my own cooking which uses the previous step to determin a negative. Cutting the generation time by half for approx 3/4 of the steps.
|
|
- added example workflows with 10-12 steps but of course you can do more steps if needed. It is not a goal to do less steps in general but also to show it is compatible.
|
|
|
|
# 10 steps with only 2 having the negative enabled. So ~170% faster. 2.5 seconds on a RTX4070
|
|
|
|

|
|
|
|
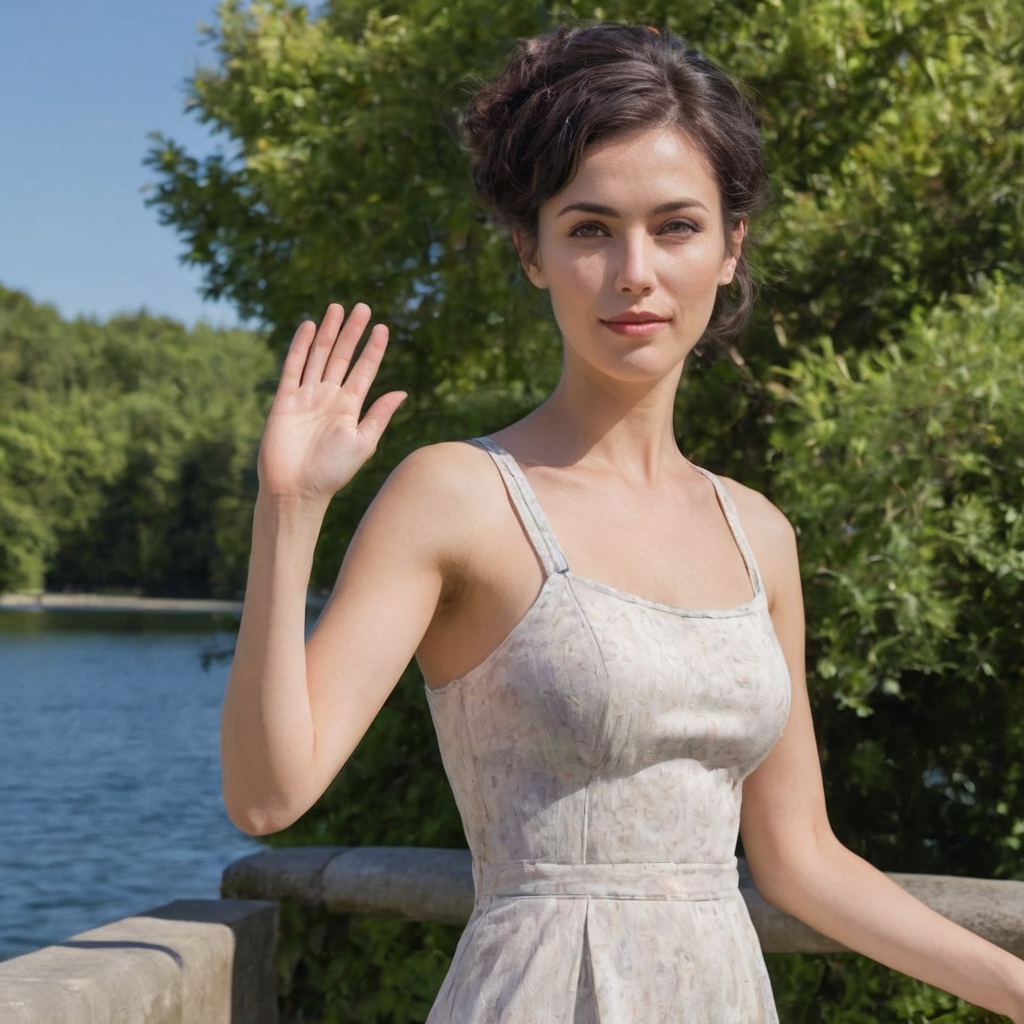
# cherry-picked 24 steps uncond fully disabled (these images are also workflows):
|
|
|
|
|
|
|
|
|
|

|
|
|
|

|